BTC - Bitcoin
 USDTERC20 - USDT ERC20
 ETH - Ethereum
 BNB - Binance
 BCH - Bitcoin Cash
 DOGE - Dogecoin
 TRX - TRON
 USDTTRC20 - USD TRC20
 LTC - LiteCoin
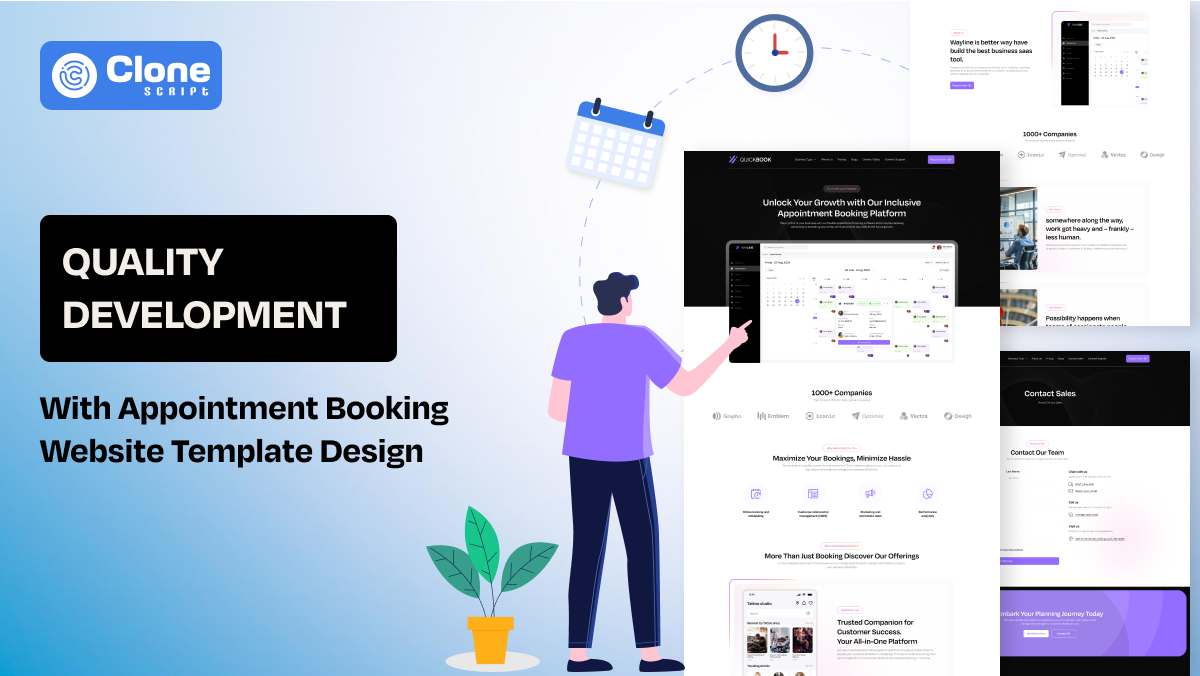
How to Create an Appointment Booking Website Using a Template Design
Businesses that offer appointments like salons, clinics, coaches, and consultants must meet one major customer expectation: online booking. Gone are the days of waiting for phone calls and back-and-forth emails. Clients now want a smooth, professional experience, and they want it fast.
That’s where a well-designed appointment booking website comes in. But what if you don’t want to start from scratch or spend thousands on custom development? The answer is simple: use a template design.
In this comprehensive guide, we’ll walk you through how to create an appointment booking website using a template. You’ll learn what features to look for, how to customize your site, and how to optimize it for performance, branding, and conversions.
Why Your Business Needs an Appointment Booking Website?
A business offering services such as therapy, beauty treatments, consultations, or health checkups runs on appointments. When customers can book appointments online without needing to call, it saves everyone time and increases satisfaction. A website streamlines the booking experience, boosts credibility, and helps you manage operations efficiently.
Key Benefits of an Appointment Booking Website:
-
24/7 availability: Clients don’t have to wait for business hours. They can schedule an appointment anytime, even at midnight. It leads to more bookings.
-
Fewer no-shows: With built-in email/SMS reminders, clients are less likely to forget their bookings.
-
Time savings: You don’t have to manually check availability or confirm slots. The system does that automatically.
-
Professional image: Having a booking website sets you apart from competitors still relying on phone bookings or messaging apps.
-
Scalability: As your business grows, your booking system scales with it, handling multiple services, locations, or staff members.
-
Better customer experience: A simple, intuitive interface increases user satisfaction and retention.
By creating an efficient appointment booking website design, you elevate your service quality and scale perfectly.
What does a Template Design offer?
A template design is a pre-built website layout that includes professionally designed pages, styling, and sometimes even functional elements like calendars and booking forms. It’s ideal for those who don’t have the resources to hire a developer or build from scratch.
Why It’s a Smart Choice:
-
Speed: Launch your website in days, not months.
-
Affordability: Templates usually cost between $20–$100, much cheaper than custom builds.
-
Consistency: Designed by professionals, templates offer a polished UI/UX design across all pages.
-
Ease of Use: You can swap out images, change text, and even rearrange sections without touching code.
-
Mobile-First Design: Most templates are already optimized for mobile. It makes your site accessible on all devices.
So, opting for a web template puts you in a better position because you don’t have to wait for a month or spend thousands of dollars on website development.
Now, let’s understand how the template design can be helpful in an appointment booking platform development.
How to create a functional appointment website using a template design?
Here are the steps to make a SaaS appointment scheduling website with a template design:
Step 1. Choose the Right Platform and Template.
This is the first step where you have to select the correct platform and website template. The platform you choose determines how your website operates, what features you get, and how easy it is to maintain.
Best platforms to consider:
-
WordPress: This is an open-source, highly flexible platform with a wide range of plugins (e.g., Bookly, Amelia). Best for businesses that plan to scale.
-
Wix: Offers a drag-and-drop interface. Great for beginners. Comes with built-in booking tools.
-
Squarespace: Offers sleek design and a built-in tool (Acuity Scheduling) for appointments.
-
Shopify: Primarily for selling, but can handle service bookings with apps.
There are certain types of templates available to opt for a correct one as per your brand objectives :
-
HTML Templates: HTML layout templates are good for developers who want full control and are comfortable handling backend integration.
-
React Templates: React website templates are known for their frontend-ready assets and perfect optimization in UI and UX.
-
Bootstrap and Tailwind CSS: Tailwind CSS and Bootstrap website templates reduce the work for designing the layouts from the start. By using pre-built components the quality web development can be done.
When you buy a website template, consider the following checklist:
-
Is it visually aligned with your brand?
-
Is any Figma dashboard design available?
-
Does it support appointment booking tools?
-
Is it responsive and fast-loading?
-
Can it be customized easily?
-
Is SEO optimization included?
Step 2. Set Up Hosting, Domain & Install Your Template.
Selecting the website template, the work has been done by only 20%. To go live, you need three things: a domain name (website address), hosting (server space), and your chosen template installed on the site.
Step-by-Step Breakdown:
-
Buy a Domain: Use a domain registrar like GoDaddy or Namecheap. Choose something brandable like www.skinandglowclinic.com.
-
Choose Hosting: Hosting providers like SiteGround or Hostinger offer one-click WordPress installation, free SSL, and good support.
-
Install the CMS: WordPress is the most common choice. It can be installed in minutes using your hosting panel.
-
Upload Template: Go to your CMS dashboard, install the theme/template, and activate it.
-
Import Demo Content: Most premium templates include demo content to help you replicate the look before customizing.
This stage brings your digital storefront to life.
Step 3. Customize Your Website for Your Business.
Customizing your template makes your website unique and aligned with your business identity.
Key Customization Areas:
-
Logo & Branding: Upload your logo and choose brand-aligned colors. For example, green may symbolize health or eco-consciousness.
-
Font & Typography: Choose readable fonts for body text and bold ones for headings.
-
Navigation: Keep menus minimal, usually 5-6 items max for ease of use.
-
Homepage: Use a hero section with your value proposition (e.g., “Book a personalized skincare session in under 60 seconds”).
-
About page: Share your background, expertise, and team information to build trust.
-
Contact page: Include a form, phone number, address (if relevant), and a Google Map.
Make sure your booking option is visible on every page via a call-to-action button like “Book Now.”
Step 4. Integrate a Booking System.
Once you customize the template as per the branding goals, it’s time to reveal the curtains behind the core element, a “booking system integration.”
Here are the best SaaS online booking system tools you can integrate with your website:
-
Amelia (WordPress): Modern, full-featured, supports multiple staff, SMS reminders.
-
Bookly (WordPress): Offers recurring appointments, staff roles, and calendar sync.
-
Wix Bookings: Already integrated into Wix, supports appointments, classes, and packages.
-
Acuity Scheduling (Squarespace): Professional tool for scheduling, payment collection, and confirmations.
-
Calendly (HTML sites): Easy to embed; works well for coaches, freelancers, and small teams.
Choosing a reliable booking platform, you’re entitled to get the relevant features.
-
Real-time availability display.
-
Email & SMS reminders.
-
Payment support.
-
Admin dashboard to manage appointments.
-
Time zone detection (for remote businesses).
Step 5. Set Up Online Payments.
When your appointment scheduling website is live on the web, the one feature you can’t miss to add and it’s setting up online payment methods.
By integrating a payment gateway, customers can pay the amounts and confirm their bookings easily. It minimizes frustration and increases commitment.
Here is the list of top payment gateways usually found on a business website:
-
Stripe/PayPal: Supports all currencies and major cards.
-
Square: Especially popular among retail businesses.
-
WooCommerce (WordPress): Allows payments and booking addons in one place.
-
Razorpay: Great for Indian businesses.
Make sure your payment forms are short, secure (use SSL), and display trust badges like “Secure Checkout” to instill confidence.
Step 6. Test the Website Thoroughly
Before launching a website, simulate a real user journey to fix potential issues. This is a time to focus on QA & testing to check the user experience and know where the improvement is needed.
What to Test:
-
Booking flow: Can users complete an appointment without confusion?
-
Notifications: Are confirmation emails/SMS sent correctly?
-
Responsiveness: Does it work well on mobiles, tablets, and desktops?
-
Load Time: Test with GTMetrix or PageSpeed Insights. Compress large images and enable caching.
-
Broken Links: Make sure all CTAs, navigation, and forms lead to the right place.
Regular testing identifies a bug-free experience that keeps users engaged with your website.
Step 7. Optimize for SEO & Visibility
Having a beautiful site developed from the website template isn’t enough. To show up on Google, you need SEO.
Take a look a common SEO Tactics:
-
Keyword Usage: Include “appointment booking" in your homepage title, meta description, and headers (H1, H2).
-
Meta Descriptions: Write compelling summaries for each page (up to 160 characters).
-
Alt Tags: Describe each image for better visibility in Google Images.
-
Internal Links: Link between pages (e.g., Home → Book Now → Services) for better navigation and SEO juice.
-
Submit Sitemap: Use Google Search Console to submit your site and monitor indexing.
Local SEO Tips:
Here are the local SEO tips to follow for getting more qualified leads for your service geographical area:
-
Add your city/area in your content: E.g., “Book appointments in downtown Chicago.”
-
Use schema markup: It helps Google understand your business details.
-
Collect Reviews: Show testimonials and integrate Google Reviews on your site.
Step 8. Launch and Promote Your Website.
Once the appointment booking website is live, your focus should shift to digital marketing. Investing in better marketing efforts brings the clients to your platform.
Here are the promotion techniques to consider:
-
Email Campaign: Running an email marketing campaign is helpful to send existing clients a link to the new site with a special offer.
-
Social Media: Share before-and-after shots, testimonials, and booking announcements. Paid social media ads are a quick option to get in touch with potential users.
-
Google Ads: Target keywords like “Book massage online [your city]”.
-
Directories: List your business on Yelp, Bing Places, and Google Business Profile.
-
QR Codes: Place them on printed flyers or brochures to link to your booking page.
Track performance using tools like Google Analytics and adjust your strategy based on user behavior.
Conclusion
Using a template design to build an appointment booking website gives you the best of both worlds: affordability and speed without sacrificing quality or professionalism. By following each of these detailed steps from platform selection to launch, you’ll not only build a beautiful website but one that works hard behind the scenes to grow your business.
If you’re a business owner looking to get started or a developer seeking a faster client delivery route, this approach is reliable, scalable, and profitable.
Whether you need a dashboard UI design in Figma or a complete website template setup with development, we’re here to help. At All Clone Script, we firmly believe in inclusivity, innovation, and reliable solutions. Contact us now for more details.